Chapter 12 Components and their properties
12.1 Text component
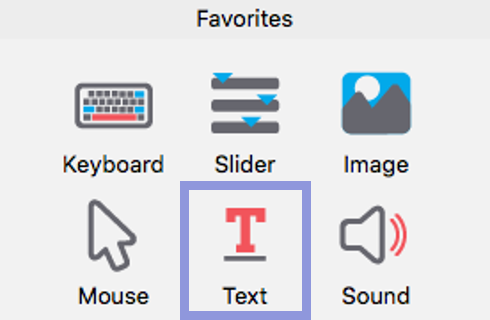
Figures 12.1 to 12.4 show the basic, layout, appearance and formatting properties, respectively, of our Text component in the routine trial.21

Figure 12.1: Basic properties of a Text component.
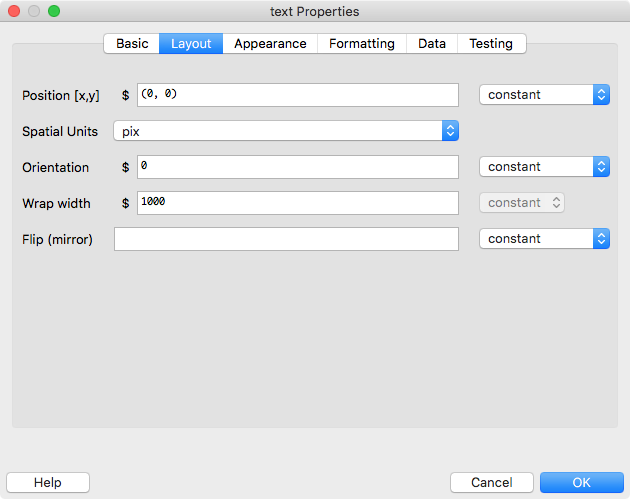
Figure 12.2: Layout properties of a Text component.
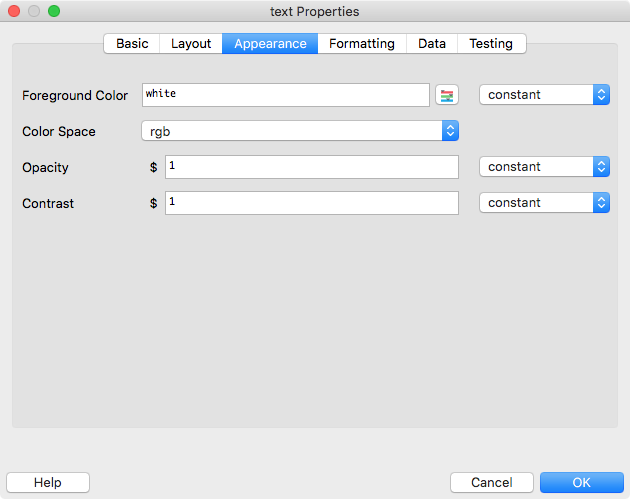
Figure 12.3: Appearance properties of a Text component. Note that what is now labeled “Foreground Color” used to be labeled “Color” in older PsychoPy versions.
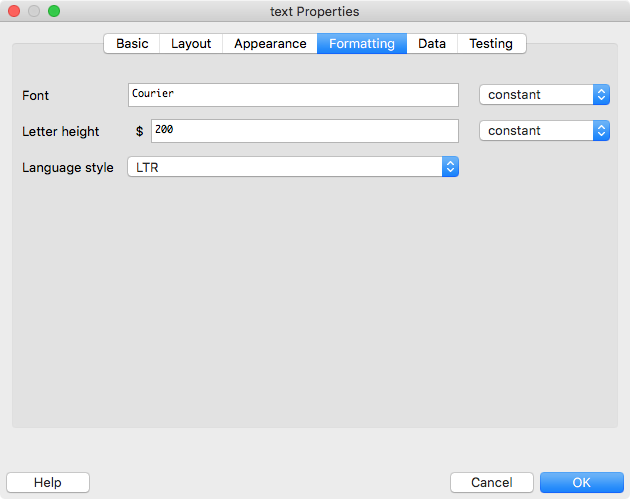
Figure 12.4: Formatting properties of a Text component.
Most of the properties are probably self-explanatory. A few comments though:
- Letter height in our example is 200. Without looking at the units used, you don’t know what 200 refers to. This information can be found on the Layout tab. In our example, it says
Spatial Units: pix. This means that the letters will be approximately22 200 pixels high. - The position is
(0, 0). In PsychoPy, these are the x and y-coordinates for the centre of the screen. You can learn more about units in PsychoPy here. - We’ll cover the exact meaning of
$stimnext week. Very briefly, together with the settingset every repeat, it means that the stimulus will be updated from one trial to the next.- For comparison purposes, have a look at the Text component from the routine
taskBegin. This has text that is constant.
- For comparison purposes, have a look at the Text component from the routine
Note that there is a pop-up help that appears when you hover the mouse pointer over one of the fields.
12.2 Image component
Figs. 12.5 and 12.6 show the most relevant properties of our Image component in the routine instruction.23
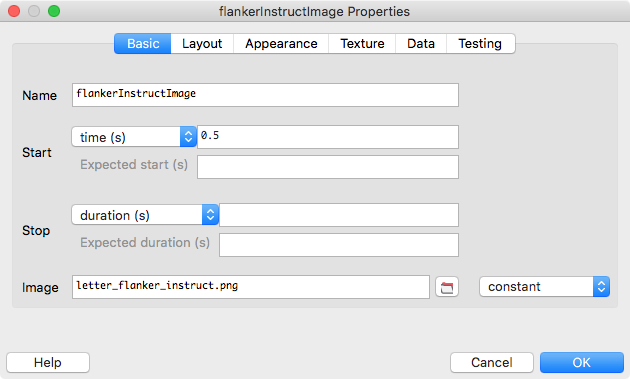
Figure 12.5: Basic properties of an Image component.
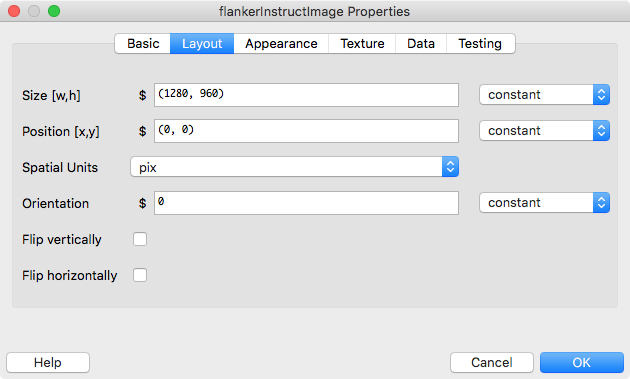
Figure 12.6: Layout properties of an Image component.
Again, a few comments:
Imagerefers to a file name on your computer. In our example, this file is calledletter_flanker_instruct.png. The image file is located in the same directory as the experiment itself (otherwise, it would be necessary to specify a path to the image).- The size of the image on the screen will be 1280 x 960 pixels (see
SizeandSpatial Units). - Setting an
Orientationallows you to rotate an image.
Note that leaving the size field empty will display the image in its original size in pixels.24
12.3 Keyboard component
Figs. 12.7 and 12.8 show the most relevant properties of our Keyboard component in the routine trial.
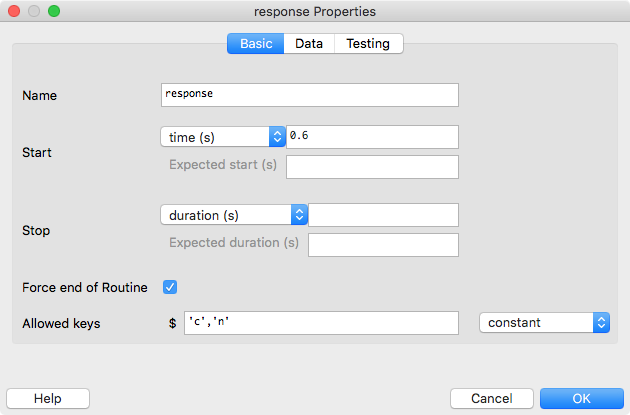
Figure 12.7: Basic properties of a Keyboard component.

Figure 12.8: Data properties of a Keyboard component.
The properties of the Keyboard component deserve some more detailed comments:
Force end of Routine: If this is ticked, a response will end the trial. If the response ends the trial, you typically want to give your participants a bit of time before the next stimulus appears on the screen. You achieve this by delaying the onset of the stimulus. This is why our Text component only starts 0.6 seconds after the beginning of the trial.
Allowed keys: These are the keys that will be registered by PsychoPy. If a non-allowed key is pressed, PsychoPy will not know about this event. To allow all keys on a the keyboard, leave the Allowed keys field empty.
Store: The default choice for storing responses is “last key”. However, “first key” might be a better choice (if a response is incorrect, you will store the incorrect key and thus know that the response was incorrect). Note, however, that if you choose “Force end of Routine”, the result for both settings will be the same as the first response will end the trial. Also note that you can choose to store “nothing”, which is useful to exclude responses to, for example, instructions.
Store correct: If ticked, PsychoPy will store whether or not the answer on a given trial was correct.
Correct answer: Of course, PsychoPy cannot know what the correct answer on given trial is. Therefore, you must supply PsychoPy with this information. $corrAns makes PsychoPy look for a column with that name in an input file you provide PsychoPy with (more about this next week).
For the remaining properties, simply leave the default values.
12.4 Building a Stroop task from scratch
Here is a video of me building a Stroop task from scratch. We’ll cover some of the things I’m showing next week only, but I thought it might be useful to have the video now to get a better understanding of how to interact with PsychoPy. That said, you could skip the video for now and have a go at the exercises in the next chapter instead. If you can do the exercises, feel free to delay watching the video until next week.
Usually, you will not need the other two tabs that are not shown here. Feel free to have a look at them though.↩︎
Height will vary for individual letters. E.g., an “a” won’t be as high as a “d”.↩︎
Again, we won’t need the other tabs.↩︎
This does not work when running an experiment online with Pavlovia though.↩︎