Chapter 10 PsychoPy basics
This week we’ll start to create our own experiments. I assume you have completed one of the flanker tasks I created for this module and potentially also the repetition priming task for PSGY1002. All of these tasks were created with PsychoPy, a piece of software developed by Jon Peirce here at the University of Nottingham. You will be using this software to create your own experiments. While there are some things you need to learn before you can use PsychoPy effectively, don’t worry about this - it’s not that complicated and we are sure you can pick up the necessary skills with some practice.
This week’s lab will be an introduction to PsychoPy. You’re going to learn how to set up very simple experiments that involve presenting text and images, and registering keyboard responses. There will be a lot of new information in these chapters. Take your time when working through them! For example, you could start with Chapter 10. After a short break, work through Chapter 11. After a longer break or a good night’s sleep, engage with Chapter 12. Finally, complete the exercises. On the plus side, there will be no additional reading this week!
With PsychoPy, the most important thing will be that you try things out. Therefore, there will be a number of exercises for you to complete. Remember that you cannot break PsychoPy15, so nothing can go wrong! As always, we will be there to support you should you encounter any problems. To solve issues with PsychoPy, it might be helpful to bring your laptop to the lab session or the help desk. If you post on the forum, please try to describe your issue in as much detail as possible. Describe what you were trying to achieve and what went wrong. State what you already tried to solve the issue. Add screenshots to illustrate the issue.
10.1 Installing PsychoPy
PsychoPy is free and open source software. It is available for Windows, macOS and Linux. You can download PsychoPy from this page. I would highly recommend to install the current standalone version. At the time of writing, this is version 2021.2.3.
10.1.1 Alternatives to installing PsychoPy on your own computer
If for some reason you cannot install PsychoPy on your computer (the most common reason being that you own a Chromebook), you can opt for one of the alternatives below. These should be considered fallback solutions, as running PsychoPy on your own machine is definitely the best option.
Loan a laptop
You can loan a laptop from the University’s Laptop Loan and Repair Service.
Use the computer rooms in the School of Psychology
All computers in A5, A6, A20 and A21 have PsychoPy installed. When these rooms are not being used for teaching, you can work there.
10.2 Opening, running and saving experiments
Please use the link below to download a letter flanker task from Moodle. We would encourage you to open the experiment in PsychoPy and to compare what you read in the following sections with what you see in PsychoPy.
The file you download is a .zip file. You must unzip the .zip file after downloading it.
- On a Mac, simply double-click on the
.zipfile. After unzipping, you should see a regular folder. - Under Windows, in the File Explorer window, you must right-click on the
.zipfile and selectExtract All.... Otherwise, PsychoPy will not be able to run the experiment.- If you double-click on a
.zipin File Explorer, Windows will let you “look into” the.zipfile, but it is not really unzipped! - If unzipping using Windows’ own File Explorer does not work, you could give Express Zip or 7-Zip a try.
- If you double-click on a
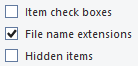
While we’re at it: The Windows File Explorer has another extremely annoying default setting (and in fact one that is a security risk): It hides file name extensions. Please do make sure to display these by clicking on View and then on File name extensions:
Download the .zip file with the flanker task from Moodle. (If you try to run the experiment and you notice that the letters on the screen look weird, try this flanker task version instead.)
Once you have unzipped the .zip file, open the folder that was created when you unzipped the file. In that folder, you should be seeing something similar to this (the exact display will of course vary depending on your operating system and settings):
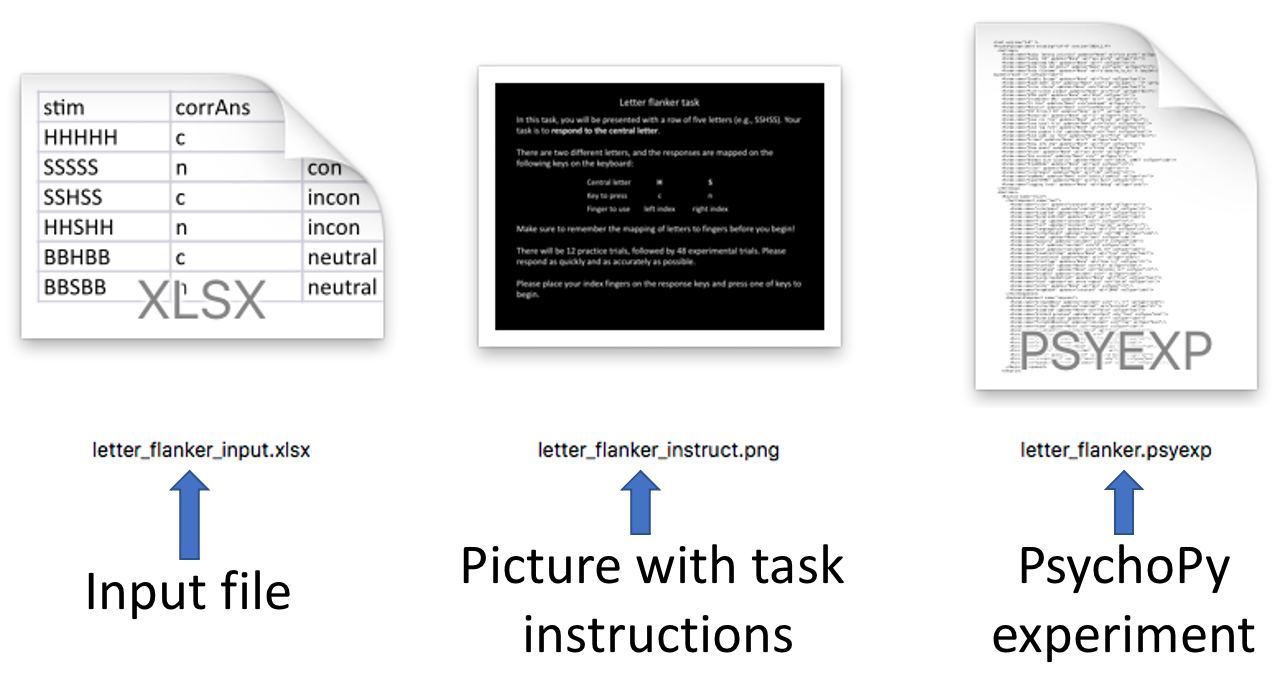
Input files will be explained in more detail in Chapter 15. How the picture is used is further explained in Section 12.2. The .psyexp file is the PsychoPy experiment. All of these files must be present in the same folder for the flanker experiment to run successfully.
10.2.1 Opening an experiment
There are at least four different ways to open these files:
- Drag and drop the experiment onto the Builder window.
- Open PsychoPy → click on the Folder icon in the toolbar → navigate to the experiment → Open.
- Right-click on the file → Open with → Applications → PsychoPy.16
- Double-click on the
.psyexpfile.
For the fourth approach to work under macOS, however, you first need to tell macOS that it should open .psyexp files using PsychoPy. Here is how to do this (if you follow these steps exactly, you need to do this only once):
- Right-click on the
.psyexpfile → Get Info → Open with → Choose… → PsychoPy. - You must then make sure to click on “Change all” and “OK” to confirm.
Depending on your operating system and hardware, PsychoPy can take a while to open (potentially up to a minute or so).
10.2.2 Running an experiment
The simplest way to run an experiment is by clicking on the Run icon:

In Section 11.5.2, we talk about another option that involves using the “Runner window”.
If you have a recent version of macOS installed (Catalina or newer) and nothing happens when you try to run an experiment, this is likely due to the stricter security settings (as compared to older versions). To allow PsychoPy to run, you need to make the following change:
- Open System Preferences.
- Click on “Security & Privacy”.
- Click on “Input Monitoring”.
- Tick the box next to “PsychoPy”.
- You might need to click on the lock in the lower left of the window to be able make that change.
If you are running Mojave:
- Open System Preferences.
- Click on “Security & Privacy”.
- Click on “Accessibility”.
- Click on the plus symbol, navigate to your Applications folder and add PsychoPy.
You need to make either change only once. If in the future an experiment does not run, check Appendix H for possible reasons for this.
