Chapter 22 Excel basics
To analyse data, it will be helpful to be a confident user of Excel. In fact, no matter what career path you choose, you will probably need to use a spreadsheet application from time to time. Therefore, having good Excel skills will not only help you in your studies, but will also be a great asset for future internship or job applications.
Please note that you will not need to remember the formulas you are going to use today. However, you should be able to find them in this document and adapt them to a new analysis at a later point in time.
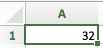
Please treat this document as a continuous exercise. That is, if we describe something that is new to you, please try it out right away. To try things out, create very simple Excel files similar to the ones shown in the screenshots below.
If you have very little previous experience using Excel, you might also want to complete an introductory Excel course online. Many of these courses are available for free.
22.1 Columns, rows, and cells
At the most basic level, you need to understand the layout of worksheets in columns, rows, and cells. In Excel, columns have letters, rows have numbers:
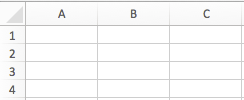
Every cell is addressed by the combination of column letter and row number. For example, the first cell is referenced like this: A1.
22.2 Cut, copy, and paste
The usual shortcuts also work in Excel (Cmd for macOS, Ctrl for Windows):
- Cut:
Cmd + XorCtrl + X - Copy:
Cmd + CorCtrl + C - Paste:
Cmd + VorCtrl + V
Note that there is a very useful variant of paste: “Paste special”. You can read more about “Paste special” here.
22.3 Selecting cells, columns, rows, and spreadsheets
To select one cell, click on it.
To select adjacent cells, click on the first cell, hold the mouse button down, and drag the mouse to the target cell.

To select a column, click on the cell containing the letter (note how the mouse pointer changes into a downward-pointing arrow).
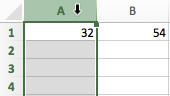
Selecting rows works in the same way.
To select all cells in a worksheet, click on the Select All button:

Much more extensive information from Microsoft on selecting is available here.
22.4 Deleting cells, rows or columns
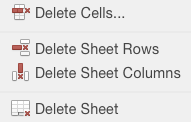
Select the cells, rows or columns, then click on Delete:

Alternatively, you can use the Delete dropdown menu:
Note that Delete will not only delete the content of the cells/rows/columns, but the cells/rows/columns themselves.
22.5 Automatically adjusting column width
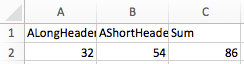
The default column width in Excel is 8.43 characters using the default font. This is somewhat annoying, as it will frequently only display part of your headers:
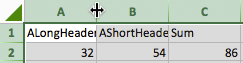
To quickly autofit the width of all columns on the worksheet, click the Select All button, and then double-click any boundary between two column headings (note how the mouse pointer turns into a double arrow):
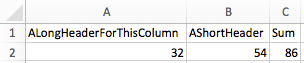
The result:
Again, Microsoft has much more extensive information on this topic.
22.6 Sorting data
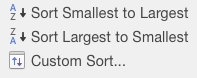
Click on this icon to sort:

You will almost always need Custom Sort...:
If your worksheet has headers, make sure My list has headers is ticked:

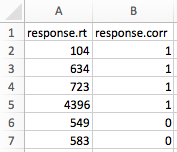
Custom sort allows you to add multiple levels of sorting criteria. This example would first sort by response.corr (first listing all correct trials), and then by response.rt (first listing the fastest trials):

The result might look like this:
Note: You need to make sure to select all columns before sorting (e.g., using the Select All button), otherwise your columns might end up being out of sync (e.g., RTs might no longer be associated with the matching accuracy information). Excel might present you with a popup warning if you fail to select all columns.
22.7 Data formats
Data in Excel cells can have one of a number of different formats. The most relevant for us are numbers and text (see here for all options). There is a simple way to identify those without explicitly checking the format: Text in a cell is left-aligned, numbers are right-aligned. Note that some functions (e.g., COUNT) only work on cells formatted as numbers.
22.8 Relative vs. absolute cell references
There are two types of cell references in Excel, relative and absolute. Relative references are the default. Absolute references are indicated by the $ sign.
A1is a relative reference to the cellA1$A$1is an absolute reference to the cellA1
Please note that you can mix relative and absolute cell references:
A$2is a relative reference to columnA, and an absolute reference to row2$A2is an absolute reference to columnA, and a relative reference to row2
How absolute cell references work is explained in Section 23.3.