Chapter 11 The Builder and its parts
We will use the PsychoPy Builder to create experiments. Fig. 11.1 displays PsychoPy’s Builder view17. The Builder window has a toolbar and three panels: routines, components and the flow. If the Builder view is not visible, you can open it by clicking on View in the menu bar18 and then on Open Builder view.
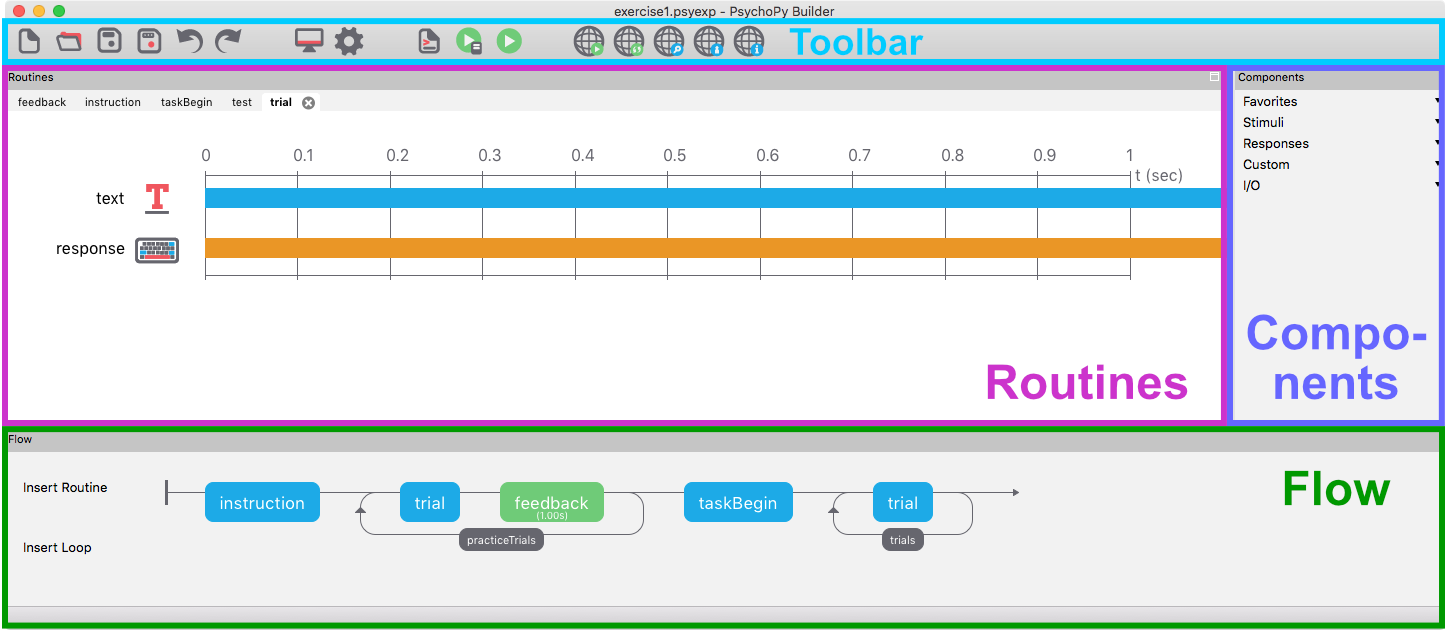
Figure 11.1: The main elements of the PsychoPy Builder view after opening the flanker experiment.
I am going to use an analogy to help you understand how PsychoPy works. Think of an experiment as a multi-course meal. Then:
- Components are ingredients that make up an individual dish.
- Routines are individual dishes.
- The flow is the order in which the dishes are served.
Like all analogies, it’s not perfect, but it might be a helpful starting point to thinking about experiments in PsychoPy. We’re now going to have a closer look at each of these parts in turn.
11.1 Components
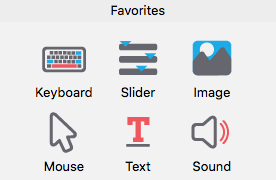
To make a dish, you need some ingredients. Analogously, you need components to make a routine. You can add components to a routine by clicking on a component icon (e.g., Image) in the “Components” panel. Under “Favorites”, you can find the most frequently used components:
Additional components can be found by clicking on the appropriate section headers (i.e., “Stimuli”, “Responses”, “Custom”, etc.).
The trial routine in Fig. 11.1 has two components: a Text component and a Keyboard component:

The Text component will present text on the screen and the Keyboard component will register a response from the participant. The blue and orange bars next to these components present information about the timing of these components. If the bars go all the way to the right, this means that their duration is infinite (however, as experiments lasting infinitely tend to be unpopular with participants, you can tell PsychoPy to end a routine when a response is given!). If we change the duration of the Text component to 0.5 s, the timeline will change accordingly:

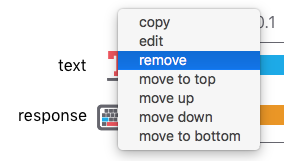
To remove a component from a routine, right-click on the component and select “remove”:
Components have a number of properties. For example, these define the timing, position, size, and orientation of a stimulus. We will have a closer look at some of these properties in Chapter 12.
11.2 Routines
The experiment shown in Fig. 11.1 has four routines: feedback, instruction, taskBegin and trial. The routine trial is currently selected as indicated by the lighter shading and the ⓧ:

In our multi-course meal analogy, routines correspond to individual dishes. Just as some dishes will have very few ingredients, some routines might consist of just one or two components. Others will have many more components, for example in cases where you want to present multiple independent stimuli. The number of components required can depend on what exactly you are trying to achieve. In the version of the flanker task you just downloaded, flankers and target appear at the same time. Therefore, only one Text component is required. This Text component might then present the stimulus HHSHH. What researchers sometimes do is give the flankers a head start (this is something we investigated in the arrow flanker task you completed previously). In this case, the flankers appear earlier than the target. Now, your routine needs two Text components. One to present the flankers, e.g. HH HH, and the other to present the target, e.g. S.
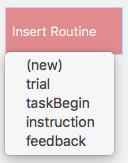
You can add a new routine to an experiment by clicking on Insert Routine and (new) in the flow. Newly created routines will be empty and are waiting for you to add components to them. Note that “Insert Routine” can also be used to add existing routines to the flow:
Upon creating a new routine, you have the option to add it to the flow by clicking on the circle that appears when you move the mouse pointer over the flow:

However, you can also click on CANCEL Insert if you’re not yet sure where in the flow you would like to place it.
Note that each routine is on a separate tab. These tabs are alphabetically sorted by PsychoPy. What can be slightly confusing is that new routines are initially added as the right-most tab independent of the letter they start with:

However, after closing and reopening the experiment, PsychoPy will have sorted the routines alphabetically:

So, if it seems that a routine you added has disappeared, check if the tab has moved to a different, alphabetically determined location!
To remove a routine from an experiment, click on the ⓧ next to the routine’s name. This will automatically remove the routine from the flow as well.
Note that you can also copy and paste existing routines (including from one experiment to another). This can be a great time-saver!:
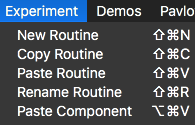
11.3 Naming components and routines
When you create a routine or add a component to a routine, you need to give it a name. There are some rules you must to follow when naming routines and components:
- Use only letters, numbers, and underscores to name them (you must not use spaces!)
- Always begin the name with a letter (numbers and underscores can only come later)
- You cannot reuse names (once you have labelled a routine or component
text, you cannot give another routine or component the same name)
PsychoPy will usually warn you if you try to use a name that is not possible. In addition, it is convention to give routines and components names that indicate what they do. For example, our routine presenting the instructions is called instruction. If it was called trial_2, it would be unclear what its role is.
11.4 The flow
In keeping with our analogy, the flow describes the order in which the dishes are served. In our example shown in Fig. 11.1, we start with the routine instruction. This routine will be followed by the routine trial, which will be followed by the routine feedback, etc.:

Note that there is a loop surrounding the routines trial and feedback (as well as the trial routine later in the flow). This usually19 means that routines inside the loop will be presented repeatedly. When routines are repeated in a loop, typically something changes from one repetition to the next. If we were to stretch our analogy a bit, it could be the waiter coming over to your table repeatedly and on each occasion serving a new type of bread: “Here is a slice of bread with walnuts.” “Here is a slice of bread with pumpkin seeds.” “Here is a slice of bread with sunflower seeds.” “Here is a slice of bread with flax seeds.” You get the idea20. In our flanker task, a loop updates the stimulus from one trial to the next. For example, the first stimulus might be HHHHH, followed by SSHSS, HHSHH, SSSSS and so on. We are going to have a closer look at loops next week.
Also, note that dishes can be served again. In our task, we use the routine trial twice in our flow. What would be a no-go in a restaurant, is a great feature in PsychoPy. If practice and experimental trials require the same components with the same properties, you need to create your trial routine only once and you can then simply reuse it when you need it again!
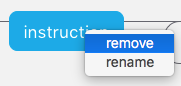
To remove a routine from the flow, right-click on the routine and select remove:
Note that this only removes the routine from the specific location in the flow, but not from the experiment or from another location in the flow.
The colour of a routine indicates whether or not it has a fixed length. If yes, it is displayed in green. If not (e.g., if the trial only ends when a response key is pressed), it is displayed in blue. Sometimes you might need to close and re-open PsychoPy for the colours to be displayed correctly.
11.5 The toolbar
The toolbar is located above the routines panel:

If you hover your mouse pointer above the icons, they will tell you what they do. There are four groups of icons. The functions of the left-most group (such as Save and Undo) are common to most desktop applications and we will therefore not discuss them in detail. The right-most group of icons is relevant for running experiments online. We won’t need this group of icons. We are going to have a look at the remaining two groups below.
11.5.1 Monitor and experiment settings
The monitor and the experiment settings are represented by icons of a monitor and a cogwheel, respectively:

You shouldn’t have to change anything about the monitor settings. However, the experiment settings are important. Most relevant in the experiment settings are the Basic tab and the Screen tab. The Basic tab is where you can alter the experiment information that is part of the start-up dialogue that is presented at the beginning of an experiment. The default setup for “Experiment info” asks about participant and session:

Here, you could for example add a field asking about age and gender by clicking on a plus sign. You could also remove information about the session if you don’t need it by clicking on the minus sign next to this field. Note that you should leave the participant field untouched. PsychoPy expects to find this as is (i.e., including the lower case)!
The Screen tab gives you access to settings such as the background colour. The default background colour is grey:

The three numbers correspond to, in this order, the intensity of red, green and blue (RGB) channels ranging from -1 to 1. Thus, other background colours can be defined in this way:
- black:
$[-1, -1, -1] - white:
$[1, 1, 1] - red:
$[1, -1, -1] - green:
$[-1, 1, -1]
It is also possible to use named colours. Thus, black or skyblue will also work. Note that in this case you need to leave out the $ sign.
11.5.2 Compiling, running and quitting an experiment
The next group of icons compiles the Python script and runs the experiment:

Clicking on the “Compile to Python/JS script” icons will turn the Builder experiment into Python/JavaScript code. You won’t need these.
The other two icons are important though: They run experiments. The “Run experiment” icon (the one of the right) directly runs the experiment. The “Send the experiment to Runner” icon sends the experiment to a separate Runner window first, where you have to click on another “Run” button. This is a bit more complicated than just clicking the Run button, but the Runner window has the potentially useful feature that it gives you access to the most recently run experiments.
The lower part of the Runner window is where PsychoPy displays error messages. This section of the Runner window is referred to as Stdout (standard out). There might also be alerts, warnings or something referred to as a PsychHID-ERROR, but these will not stop your experiment from running. If there is an error that stops the experiment from running, the error message will be immediately followed by the message ##### Experiment ended. #####.
Please note that you can press the “Escape” key at any time to quit a running experiment. If you are running macOS and pressing “Escape” has no effect, try “Cmd + Alt + Escape”.
The newest version of PsychoPy has a couple of additional components that we will not need. Note that PsychoPy also has a Coder view for those who would like to write Python code. We will not need the Coder view.↩︎
If you are using Windows, the menu bar will also be part of the Builder window. On macOS, the menu bar is always displayed at the very top of the screen.↩︎
Sometimes a loop is used to stop a routine from running!↩︎
Speaking of bread: I can highly recommend these Nottingham bakeries: Small Food Bakery and Tough Mary’s Bakehouse↩︎